Showing posts with label #Cabbages. Show all posts

18 July 2020

Home Page

Latest Update 18 July 2020.

The new propagator is still evolving, and the latest incarnation contains the following features:-
  • Greater stability for the potting table and more space for a storage shelf under (still to come).
  • The cover is angled so that it improves solar capture during winter.  Melbourne's latitude is about 38 deg. south which means that in mid spring and autumn the optimal angle to set the cover is 38 deg, but in winter when we need sunlight most, the sun is lower in the sky, so the design angle has been set at 45 deg.  This angle is also easier to deal with during construction.
  • The steeper angle of the cover provides more height for growing-on taller plants like tomatoes in larger pots.
  • The design of the cover and lowering the front wall of the unit improves the amount of light coming into the unit considerably.
  • A new external frame on the cover holds the polycarbonate sheet flatter than before making it more secure against flying insects and heat loss.
  • In summer the new cover holds 21% or 75% shadecloth instead of the polycarbonate sheet to cope with extremes of wind and temperature and excludes pests.
  • The floor space inside the propagator is the same size and shape as previous models and comfortably holds either three 30 (small) cell or three 12 (large) cell seedling trays.
  • Two new 2 stage air vents are set high in the side walls to help regulate daytime propagating temperatures in spring and autumn.  They are usually kept closed in winter.

09 May 2020

June Blog 2020

Latest Update 7th June 2020.

This is my latest propagator design.  Its based on my EcoPropagators, but has no self watering capacity.  After 3 years of excellent results with the old model, its proved to be more expensive and time consuming to maintain than expected.  This is mainly because the wicking medium needed to be replaced regularly to avoid pest build up, and the constantly wet environment makes frequent repainting necessary.

The new units (I have built 2) are smaller and considerably lighter than the old ones because they no longer have a built in water tank and the associated wicking apparatus.

Because of this I have been able to raise the unit to a more sensible working height (for an old codger like me), and still retain some of the old unit's best features.

The new design has a slatted platform built into the unit to support three 30 cell seedling trays.  The bottom of the unit is sealed off from pests by a layer of heavy duty shadecloth.   The unit retains the multipurpose cover which helps moderate extremes of temperature in the hottest and coldest of our weather.  Its also very effective at protecting the seedlings in heavy rain and high winds.

Currently I do my sowing and initial transplants on a bench in my shed, but I may build a pull out bench to fit under the body of the unit to make transplanting from tray to tray easier.  It's all a bit of work in progress at the moment, but so far so good.

19 July 2019

April 2020 Blog.

Latest Update 10th April 2020.
 
Its my intention to abandon crop rotation in my 4 Ecobeds.  I want to concentrate on refining the conditions in each bed to suit the crops I grow in them every year.
Ecobed 2 has been selected to grow climbing legumes with catch crops of Cabbage and Lettuce in between. The relocatable climbing frames shown in the top photo have been de-commissioned and replaced by permanent pest exclusion frames capable of protecting tall crops from bird and insect pests and from extreme weather in summer (above). This new framing system provides support for peas or beans climbing up to 1800mm tall.

Ecobed 3 will be upgraded later in the year with a similar new exclusion frame capable of supporting 16 climbing tomato plants. Marigolds and Sweet Basil will be grown between the tomatoes during the summer months as companion plants.  

Both these beds will grow other vegetables as required when the main crops are finished.

31 January 2017

January 2017

Lil only has a small hand, but this Amish Paste tomato is still a whopper.  Amazing what will grow in soil fed only with compost but with an Ecobed's continuous supply of captured rainwater.

28 December 2016

December 2016.

Its the last week of December and the weather is getting hot.  Today is a very warm 32C, and thunderstorms are predicted later on with up to 25mm of welcome rain in our area.  Every plant in this photo is coping well with the hot windy conditions despite their disheveled appearance.  

I'm particularly pleased with the Anzac peach which is growing strongly despite a bad start with leaf curl in spring.  By removing the damaged leaves as they appeared, new leaves are given a boost and the tree recovers.  

I always swear I'll revert to using a spray of lime sulphur to control the leaf curl the following year when I see the dreadful damage on the tree, but I would rather invest the time removing damaged leaves than use chemical fungicides.  Easily said, of course, when you are retired like me with the time to do it.
My tomatoes are growing well despite limiting fertiliser use to a 60mm dressing of homemade compost and a 50mm covering of sugar cane straw mulch.  

I nip off all laterals as they appear and nip out the leader after 5 trusses have set.  It keeps the plants compact and manageable in a small garden space like mine.
Amish paste tomatoes are ugly looking plants, at least in my garden, but the fruit is lovely.
Tommy Toe Tomatoes on the other hand are much better to look at and the fruit grows in lovely even trusses.  They are just starting to ripen, and I usually remove them before they are fully ripe to avoid damage from birds.
My Blue Lake climbing beans are growing quickly and will soon shade out the plants in front of them.  When that happens, I will need to be ready to move the threatened plants to a new location.
Hybrid thornless blackberries grow strongly but are not too invasive.  They make great jam and combine well with apples in pies.  I will need to net them soon to stop birds taking the fruit, and to lessen the drying effects of the sun and wind.

30 September 2016

September 2016(2).

I have just harvested a small crop of beetroot although there is nothing small about their individual sizes.
They were pressure cooked at 5psi for 45 minutes, and emerged nicely cooked through, sweet and succulent.  I got 4 jars of sliced beetroot pickled in a sweet spicy vinegar, and made a cake with the rest..

29 September 2016

September 2016.

The peas are setting pods and we have a small harvest ready for immediate use.  The broad beans are still a few weeks away though.
We had a great display of blossom on our dwarf espalier apples last year, and this year is shaping up to be even better.  Unfortunately last year, due to inclement weather or possibly inappropriate use of chemical pesticides by neighbours, my pollinators did not turn up for work and I lost the whole crop.  There seem to be plenty of bees around this year and I have more flowering plants available to keep them interested, so I am hoping they clock in on time.  If not I will have to sack them and hand pollinate the apples myself.
My potatoes have broken through and are growing strongly.  I had a 97.959183% success rate, in other words I lost 1 of the 49 seed potatoes I planted.  However, ever resourceful, I emptied out my bag of shop bought organic potatoes to find 1 of them, near the bottom, putting out new shoots.  So I planted it in the vacated space.
Here is my production line of mini cabbages and red iceberg lettuce.  I hope we never grow tired of their fresh, crisp tastiness, because if we do, I don't know what I will replace them with.  In the top left hand corner of the picture is a small patch of recently sown Nantes carrots under a protective covering of shadecloth.  
I think I've found the ideal plant to grow in Ecobins.  Just 4 broad bean seeds in each bin produce this vigorous healthy growth and hopefully a substantial harvest of beans.
These 9 root cuttings in the centre of the picture are taken from the edges of my lawn.  The propagator will, hopefully, nurture them so that in a month or two I will be able to randomly plant them out in my nature strip amoungst the wild grasses and flowers growing there at the moment.  It will be interesting to see if they can stand the competition.

31 August 2016

August 2016.

This space contained 3 mini cabbages and 2 Romanesco broccoli.  When I harvested them I cut each plant down to the ground, and left the roots to rot so the soil structure remained undisturbed.

Debris and old mulch were removed to expose the soil and a 60mm layer of compost was spread over the bed.  To keep this layer moist and the soil microbes active, I covered the compost with a fresh layer of organic sugar cane mulch (seen here only half complete).  In a couple of weeks time I will be planting more mini cabbages and Red Iceberg lettuce.

19 August 2016

August 2016.

My cauliflowers have been good this year, and I have more to come, planted in the herb and ornamental beds while there's space.  Most of my ornamental plants are dormant or growing very slowly at the moment.  If it works out as expected, I wont grow my large brassicas in Ecobeds next year.
I love the look of Romanesco broccoli, and it has a lovely mild flavour too.  The broccoli will probably go into the drip line irrigated beds next year with their cousins the cauliflowers.
This Waltham broccoli has been sending out these small florettes since I removed the main head about 6 weeks ago.  Its a welcome boost to productivity at a time when most of the edibles in my garden are growing very slowly.
These lettuce and mini cabbages are the exception, growing quickly and should be ready for harvest in 2 or 3 weeks.
The peas and broad beans have been very slow this year, probably because of Melbourne's heavy winter cloud cover.  The weather reminded me of a gloomy winter in the North West of England.  Despite this they are starting to flower, and it wont be long before we are enjoying those beautiful freshly picked peas again.

03 June 2016

June 2016 (2).

Ecobed 4 has brassicas growing in it this year.  I usually pack them in too tightly, but this year they seem fine.  I started with 5 lettuce, 3 mini cabbage , 2 mini cauliflower, 2 Romanesco broccoli and 2 Waltham broccoli.  3 of the lettuce have been harvested and curds are forming on the Waltham broccoli.

The Romanesco broccoli have a beautiful, tasty decorative, pale green curd, but only produce one per plant.  Waltham on the other hand after producing a large central curd follows by a succession of smaller florets over several weeks.

02 June 2016

June 2016.

This is Ecobed 2 growing light feeders this year.  Its just turned winter and its cool outside.  I've just cleared the mulch off this patch of soil and I'm planting leeks.  Its another feature of Ecobed design, that you can use the tops of the bed wall to run temporary guide lines just using small nails and a piece of string.

I like to transplant my leeks early while they are quite small (these are 200mm) and plant them into holes 100mm deep made by my makeshift dibber.

They are watered in once only to bring the soil into close contact with the roots so the microbes can set up their mutualistic relationships.  There's no need for further watering since the Ecobed's moist soil will suffice.

The dark coloured shadecloth I use on this end of the bed warms in the sun and helps keep temperatures in the bed mild for this time of year.

I have added a new hatch to this bed recently.  The 2 cut outs are in the bed' s original net covering and enable adequate access to the bed without having to use a lot of staples to keep the cut edges taught.

Here's a look down the length of the bed.  There's still one small patch to fill, and I have a second batch of Australian Brown Onions almost ready for that purpose in the propagator.  I wanted to grow more alliums this season, so that leaves less room for carrots, beetroot and silverbeet.  I'll have to find some space elsewhere.

10 May 2016

May 2016

Organic Gardening is fantastic, not only do you get enormous pleasure from growing things and enjoy the benefits of fabulous highly nutritious tasty food, you also get a regular workout making Hot Compost.

I keep my green organic waste in a small compartment next to the main bay in my current version of a compost heap.  The dry brown material is collected in an open space alongside.  Here the heap has just been combined, with alternate 100mm layers of green and brown (dry) kitchen and garden waste.

To supplement my collection of green waste, I have added 2 bags of cow manure and a few handfuls of dynamic lifter (pelletised chicken manure) and blood and bone fertiliser.  Most of my browns are from spent sugar cane mulch, but I added a bale of fresh mulch to make up the volume this time.

As the heap is built, water is added till the material is moist but not ringing wet.

The heap is ready to go.

I cover the heap to reduce evaporation and to stop it soaking if it rains.  The multilayer reflective tarpaulin helps insulate the heap and compensate for a lower than optimal volume.

After 3 days, the heap has started to warm up, and needs to be turned inside out and aerated.  I remove the whole heap from the bay throwing the material up in the air to aerate it , and I do the same thing as I return the materials afterwards.

I put material from the outside of the heap in one pile and material from the inside in another pile.  When I return the materials, I reverse their positions.

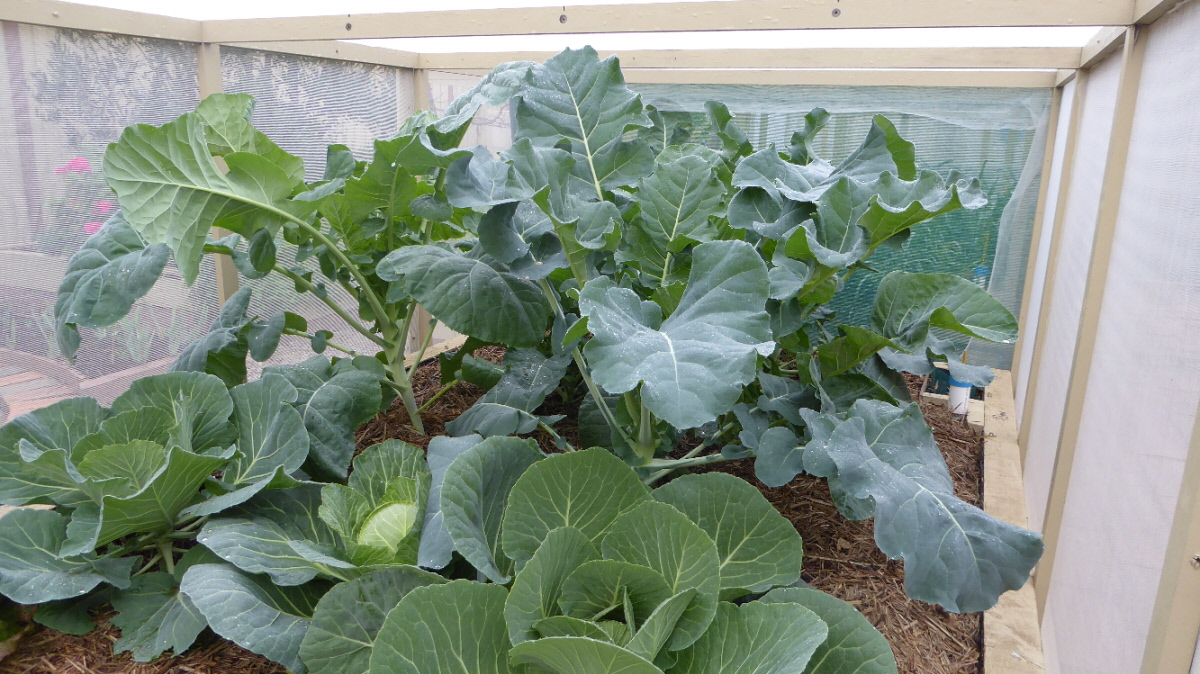
This process is repeated every 2nd day 5 more times, and then the pile is left for at least 5 days to mature before being used in the garden.   The process is very quick (18 days), gets hot enough to kill plant pathogens and kills unwanted seeds.  The heap is rich in beneficial microorganisms, nutrients and humus.  I use a lot of it in my small garden, but I don't add any other fertilisers to my soil.

24 January 2016

January 2016 (2)

Ecobeds can handle close plantings like this.  Its the natural way to grow herbs and vegetables, and this bed is growing climbing beans, tomatoes, dill, parsley, thyme, basil, oregano and a geranium.
All three stages of bean production are shown here including bud formation, flowering and bean pod development.
A nice truss of tomatoes.
This bed looks very neglected, but the potatoes will soon be ready for the main harvest.  Although I have already harvested a sack full of potatoes from the back of the bed for immediate use, I will wait until the foliage dies right back before harvesting the main crop. That way the potatoes should store longer before trying to grow new shoots.

18 January 2016

January 2016

The beans are at full height and are in flower.  The first pods are about 60mm long and I am hoping for a substantial harvest, particularly as I have just bought a small chest freezer to preserve some of them.

This photo was taken after a day of high temperatures (38 deg C max) and drying winds.  The shadecloth did a great job of protecting the whole bed using the standard timber framework for support.

26 December 2015

December 2015

My potatoes are overgrowing the Ecobed and I am hopeful they will deliver a fine crop in a few weeks.  They came under attack from whitefly a few weeks ago, but a couple of sprays with Eco-oil have kept them under control.

13 November 2015

November 2015

Its November and in 2 weeks we move into summer (southern hemisphere).  We've had a few hot and windy days recently with temperatures in the mid 30's (deg C), and the propagation unit has worked very well keeping my seedlings well protected with hardly any wilting in the hot sun. 

The key factor of course is the constant supply of moisture to the plants, but the design could be improved, and I may have a go at mark 3 down the track.  The problem is that water consumption is very high and the water tank's capacity is modest.  Water loss from the exposed sand is the problem, and I may need to make a larger unit with space to mulch between the pots and punnets.

I still get 2-3 days between tank refills in hot weather, but we should aim for better than that with a deeper tank.

The unit is generally doing its job well, and the Vegenet cover has kept the seedlings nicely protected against flying insect pests and hot sunshine.  

28 September 2015

September 2015 (2)

Its the end of September already and I'm getting ready for spring planting.

To help me keep track of what needs to be grown in each bed, I have set up a couple of pages to record spring and autumn plantings of vegetables grown in my 4 Ecobeds.  Here are some of the reasons for adding this feature to my blog:-
  1. I have a shocking memory and need a reminder when I'm ready to start spring and autumn plantings.
  2. I need to know what's the best use of space.
  3. I need to take the direction of the sun into account, especially as half my Ecobeds are north - south oriented and the other 2 are east - west.
  4. Usually you put the larger plants in a bed furthest away from the sun, but sometimes smaller plants need protection from hot sun (as with the lettuce in the diagram).
  5. As well as rotating crops from bed to bed each year, I like to change their position within the bed when spring planting takes place.
  6. When crops are grown in succession throughout the year, they are usually relocated in spring as described above, but in between the main plantings they have to be grown in the same spot.  Its not ideal but so far its worked ok with just a month for soil preparation between plantings.
  7. I try different layouts each year to see what works best, and I need a record of what's been tried before.

Each layout represents how plants are arranged in one of my 4 Ecobeds.  The growing area in an Ecobed is 2550mm x 1500mm.


12 September 2015

September 2015


This is Romanesco Broccoli, and this is the first year I have grown them.  They have a very large single head (no follow up side shoots) more like cauliflower than broccoli and they look great on the dinner plate.  They have a mild taste and we like them steamed seasoned with salt and pepper and a few herbs.  We planted 3 of them and they dominated the Ecobed for a while.  They have all been harvested, and this one was cut up and preserved in the freezer (large zip tie bag).


I built this removable pest exclusion frame after losing my dwarf Mayer lemon tree a couple of months ago.  I decided to grow brassicas in the bed while I worked out what I should do about a permanent replacement.

It nearly died 2 years ago when an old style overflow pipe got blocked, and the bed it was growing in was flooded by heavy rain.  Although both my dwarf citrus trees have grown well in Ecobins in the past, they outgrew them and were transplanted into these smart new Ecobeds last spring.

Both trees struggled all year, and I'm not sure whether they had been moved too often or are not suited to the constant moist soil they live in.  I will concentrate on the orange tree's recovery this year, and leave any decision about a new lemon tree until next season, meanwhile I will grow brassicas in the bed.


21 August 2015

August 2015 (2)

Its spring next week and my peas are in flower.  They love this sheltered spot and have always grown well in Ecobins.  There are 12 pea plants in each bin, which I thought was pushing it a bit, but they all seem to be quite healthy and growing strongly.  They do get some help from that gas water heater, it not only keeps them warm, but it feeds them with CO2.

I use lettuce as catch crops because they are fast growing and can be harvested before the surrounding plants get too big.  There were 4 in this spot originally but 2 of them have been harvested, and the 3rd one supplied a few leaves for lunch today, very tasty.  I always take them very young when planted like this. 

04 August 2015

August 2015

Here is next summers crop of potatoes being chitted ready for planting at the end of this month.  They are in near perfect conditions in this mini greenhouse, since it doesn't get direct sunshine in winter but gets plenty of light and is kept warm even in frosty weather.